SteelSeries Java Swing component library

Here we go again…

A few months ago i started a new project where i again focussed on gauges (i love that stuff). It took me some time because i only work on the project on my spare time (which is rare) but now i finished a first version of a little library that contains a lot of gauges for Java applications…

First of all i have to mention that this library was not meant to be a professional components library and should not be used on mission critical software. Means if you use the library it’s on your own risk !

I’ve never before created a component library and for me it was and is a great challenge to dive deeper into the Java universe…

But now let’s have some fun…

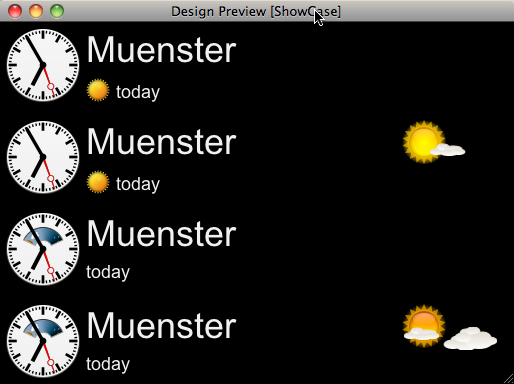
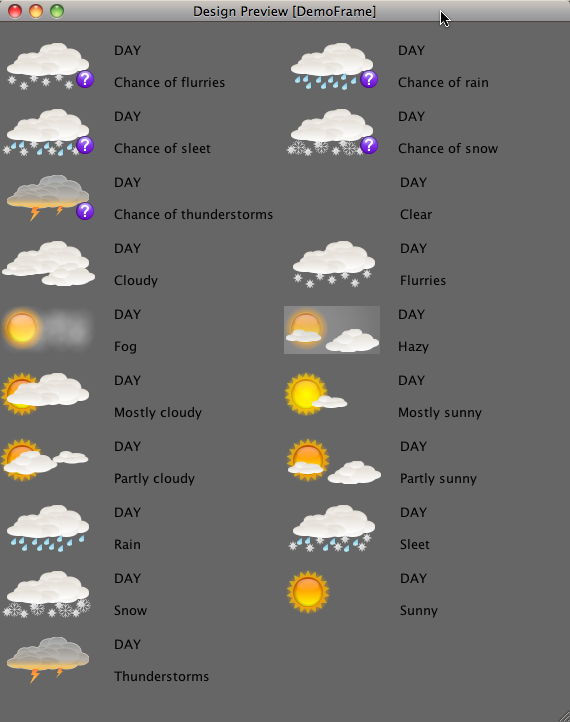
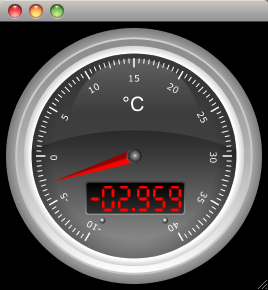
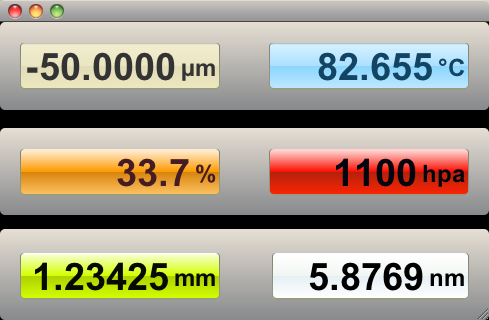
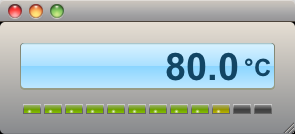
The library contains two general types of gauges, radial and linear ones and some little candy in the form of additional components like a Radar component etc.

I add some properties to the gauges that hopefuly will be useful for some of you.

Here is a short list of the most interesting features:

  • frameDesign (metal, shiny metal, blackmetal)
  • backgroundColor (dark gray, light gray, white, black, beige, red, green blue)
  • pointer/bar color (red, green, blue, yellow, orange)
  • a three colored track to visualize areas of special interest (e.g. a critical temperature range)
  • thresholdIndicator
  • blinking threshold led (red, green, blue, orange, yellow)
  • adjustable tickmarks
  • indicators for min. and max. measured values
  • auto reset to zero feature

It should be possible for you to create your own components out of these library and  if you’ll take a look at the source you will find components like Radial1Lcd, Radial2Lcd and Radial3Lcd where i used Netbeans matisse gui builder to create the component from the FrameCircular and DisplaySingle components.

So you should be able to check read the sourcecode of these components and see how i did it (the easiest way would be to use Netbeans to check the source).

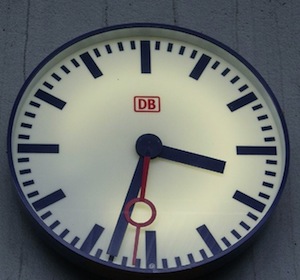
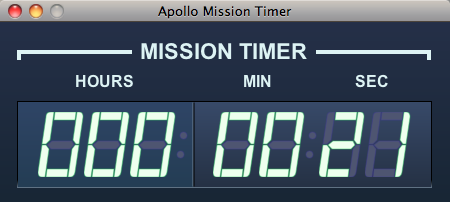
But to give you a impression, let pictures speak… weiterlesen


Swing event departure board

Sitting at Gard du Nord train station in Paris in January this year i saw this huge departure board:

Gare_du_Nord_Paris.jpg

It was fascinating to see and hear all these flipping characters everytime a departure time changed. I guess most of you know already how these boards work but for all others i will explain it shortly.

The arriving trains are in chronological order from top to bottom of the board which means the trains that arrives as next stays on top of the board.
The flipping characters are made of little metal plates that are printed on the front and backside with characters that are split into half. The Top part of the character is printed on the frontside of the upper plate and the bottom part of the character is printed on the backside of the lower plate (i tried to visualize it with a little image). weiterlesen


Swing Weather Worldclock

Remember the worldclock blogpost? Well it was ok but i thought there was one thing missing…

Weather information

For that reason i added this missing feature to the known worldclock component so that you now might choose out of four clocks:

  • Pure clock and icon indicator for time of day
  • Pure clock, icon indicator for time of day and weather information
  • Clock with inbuild time of day display
  • Clock with inbuild time of day display and weather information

This image shows all available clocks:

ishot-6.png

To get the weather information for all the cities in the enum i provide, i needed to add the country for each city and by adding all these countries i translated the cities to their (hopefully) right english names (in the original worldclock post i used german city names).

I use weather underground to retrieve the weather information because they provide an easy to access service for free. You will find a package called „net“ in the project in which i put the classes responsible for fetching the weather condition. There is timer which checks every 30 seconds for the availability of the connection.
The clockpanels will every 10 minutes add a so called ConditionFetcher thread to the queue of the WeatherService which will be handled by a ExecutorService. The WeatherService will tries to use the system proxy server if there is one so it hopefuly works out for you.

The most of the work was done by creating all the different weather condition images which you will see in the next image:

ishot-7.png

weiterlesen


Drawing in code (Part 2)

Drawing in code:

Part 2 (Transfer the prototype into swing):

So you will find out that this is not magic but only drawing the same elements that we used in the vector drawing programm but now in their Java2D representations. We just create a buffered image with the same size as the prototype. So we could use the same pixelcoordinates for the shapes and gradients in swing.
weiterlesen


Drawing in code (Part 1)

Drawing in code:

Part 1 (Drawing the prototype):

After i published my little fun swing nixieclock i got a lot of requests on how i transferred the image into swing.
Because i remember when i was starting swing development i asked myself the same questions when i saw the amazing work of swing/design guru’s like Kirill Grouchnikov, Romain Guy, Joshua Marinacci, Chet Haase, and others.
Well in the meantime i figured out how to do this and find a workflow that i would like to share here. By the way this is really nothing compared to the things these swing/design guru’s are able to do.

So here we go, first of all i have one good advice for you „Know your tools“,
which means not only java and swing but also your graphics program.

So i’m using Adobe Fireworks for that but you could also use any other kind of graphics program like Adobe Photoshop, Gimp, Inkscape etc.

I will start the tutorial with the drawing of the tube in Adobe Fireworks because it makes coding in swing so much easier if you know how to draw it in a graphics program. So the first part will be focussed on the drawing and the second part will explain how to draw all the different points in java2d/swing: weiterlesen


Swing Apollo space program mission timer

Still on vacation i took the chance to spent some time on watching movies i ordered some time ago and so i watched several movies related to the Nasa moon landing program which lead to the landing on the moon in july 20th 1969.
In the movie MoonShot which tells the story of Apollo 11 and it’s flight to the moon in 1969 i was fascinated by the board computer of the command module and took a picture of the mission timer which looked great to me…

MissionTimerOriginal.jpg

Because i love coding in Java and those things could be easily done in Java’s swing framework i decided to create a little mission timer by myself and that’s a picture of the result

MissionTimerJava.png

I don’t know if it’s useful to anybody but for those of you who like it, i added the source as netbeans project here MissionTimer.zip

You will find two classes in the project, a JFrame and a TimerPanel. (If you would like to use the TimerPanel in another project you just can drag’n drop the TimerPanel class onto a JFrame, JPanel etc.)

To start or stop the timer you just have to click on the panel with the left mousebutton. To reset the panel just doubleclick on the panel.

Enjoy it and keep swinging…


Custom swing component

During my vacation i’m playing around with the SunSPOT’s from Sun Microsystems which are fantastic little gadgets. (Please find more information about them here.)
I attached a combined temperature/humidity sensor to one of my spots and used xmpp protocol (with smack library) to communicate with my SunSPOT host application from wherever I am.
To visualize the measured values I needed something sexy and because there was nothing ready to go I created two little „instruments“ that I would like to share with you.

And here they are:

First a gauge:

ishot-2.png

Second Java Swing component is a display (yes I know it’s inspired by Apples iTunes):

ishot-1.png

Third custom Swing component a combination of the display with a led panel:

ishot-3.png

I think I’ll have to do some work at the 3d-effect of the rounded rectangle but as a first prototype they looked ok to me.

You can find my presentation on custom Swing components here, the Netbeans project for the components in the article can be downloaded here: Instruments, the Netbeans project for the application from the slides is here: SD.zip

If you are interested, please leave a comment…


Swing Workshop

Am Samstag dem 28.11.2009 findet ein Workshop zum Swing Talklet vom 03.11.2009 statt.

Uhrzeit: 14:00 bis 18:00 Uhr.
Ort: Hörsaal Leo 18, Leonardocampus, Am Johann-Krane-Weg zwischen der Eishalle und dem Technologiepark (http://tinyurl.com/jugmsleo18)

Inhalt:
Da Swing ein sehr umfangreiches Framework ist, kann im Workshop lediglich ein kleiner Auschnitt
behandelt werden.
Es wird gezeigt, wie man in Swing einen Button so umgestalten kann, daß er dem aktuellen JavaFX
Design („Caspian“) entspricht. Der Workshop soll hierbei nicht als Votrag im üblichen Sinne dienen, sondern als Hands-On Session, was bedeutet, daß jeder einen Rechner mitbringen sollte.
Dabei wäre es sinnvoll mindestens Java 6 Update 10 installiert zu haben, wobei sich das Beispiel auch
unter Java 5 noch verwenden läßt.
Der Workshop soll dazu dienen in die Funktionalität von Swing reinzuschnuppern, wobei der Schwerpunkt hier auf customized components liegt und nicht auf Swing Grundlagen.
Natürlich stehen wir auch bei „Anfänger-Fragen“ jederzeit mit Rat und Tat zur Seite, soweit wir die
Antwort wissen 😉

Voraussetzungen:
– Computer mit entsprechendem JDK
– Entwicklungsumgebung (demonstriert wird auf Netbeans)
– Grundlagen Java
– Spaß am Coden…

Jeder an Desktop Java Interessierte ist herzlich dazu eingeladen teilzunehmen…